Last updated on April 2nd, 2026 at 02:41 pm
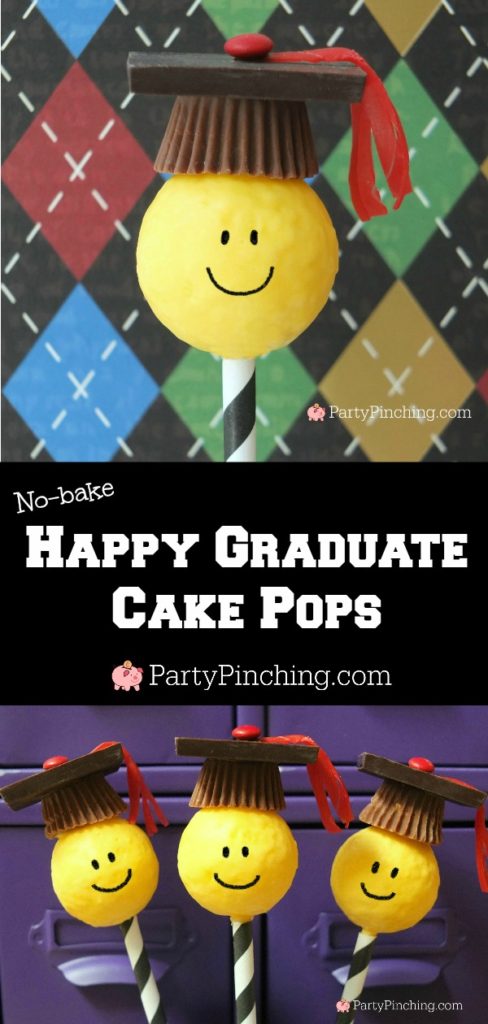
Hat’s off to these adorable Happy Graduate Cake Pops! So easy to make they are the perfect treat for your Open House Graduation party for high school, pre-school, elementary school or even college! They are no-bake so they take the stress out of menu planning! Super fun and easy to make!

Get my no-bake cake pop recipe here. Make the pops and then follow this recipe:
You will need:
12 snack cakes (such as Little Debbie Fancy Cakes)
1 (12 oz.) bag of yellow candy coating wafers
12 lollipop sticks
12 chocolate squares (such as Ghirardelli or World Market)
1 Fruit by the Foot
12 mini M&M’s
12 miniature peanut butter cups
Black edible marker
Directions:
- Unwrap 1 snack cake and place in a bowl. Mash with a fork or mush with your hands to bind the frosting and cake together.
- Roll into a ball.
- Melt candy coating wafers according to package instructions.
- Dip one end of a lollipop stick in the melted candy coating and push halfway into the cake ball.
- Place cake pops on a cookie sheet lined with parchment paper in the freezer for an hour.
- Dip cake pop into the melted candy coating, tapping the stick gently against the side of the bowl to remove excess.
- Place in Styrofoam block to dry.
- Cut off a 2” strip of Fruit by the Foot, then cut in half horizontally.
- Make 3 cuts lengthwise halfway through the Fruit by the Foot.
- Roll the remaining uncut part of the Fruit by the Foot together so it resembles a tassel.
- Attach the tassel to the middle of the chocolate square with the melted candy coating.
- With a toothpick dipped in melted candy coating, attach the mini M&M in the middle of the chocolate square and cover the tassel. Let dry completely.
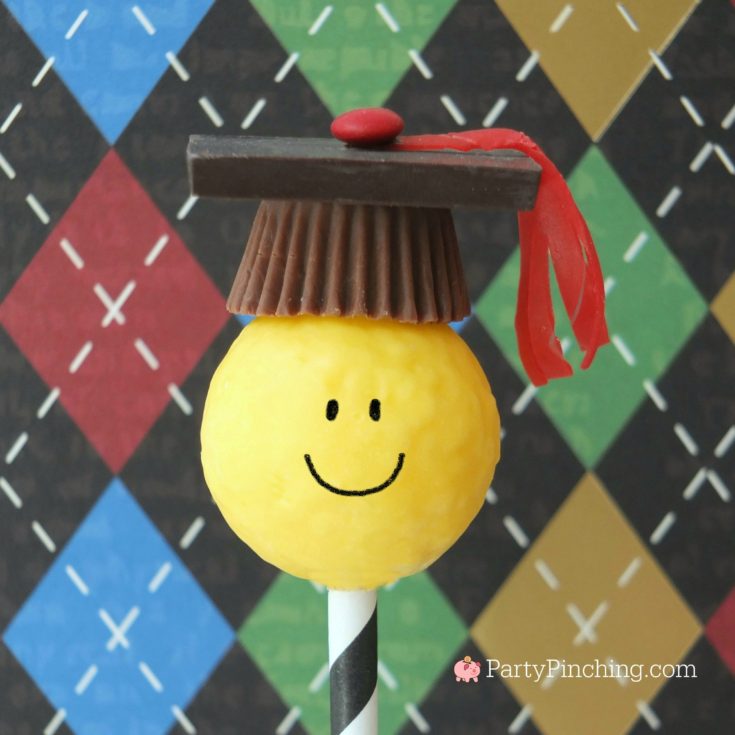
- Using the melted candy coating, attach the chocolate square to the BOTTOM of a miniature peanut butter cup so it resembles the mortarboard cap.
- Secure the cap to the top of the cake pop using the melted candy coating.
- With the black edible marker, draw a smiley face on the front of the cake pop.
Makes 12 Happy Graduate Cake Pops Tip: For step-by step instructions on how to make no-bake cake pops, click here
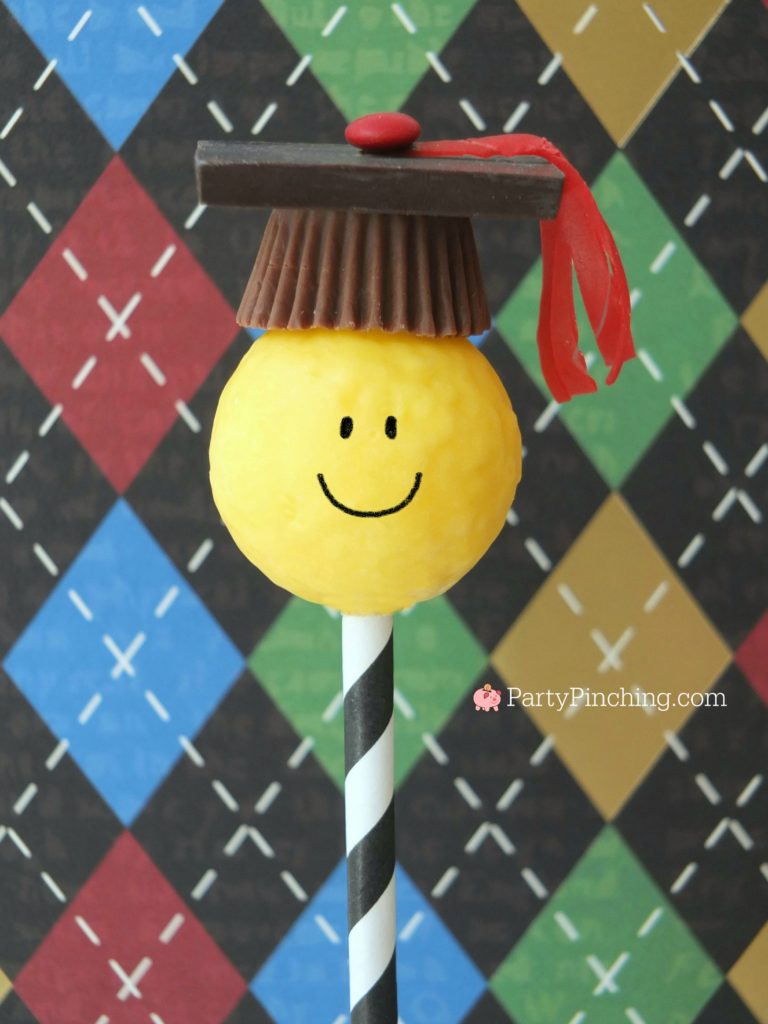
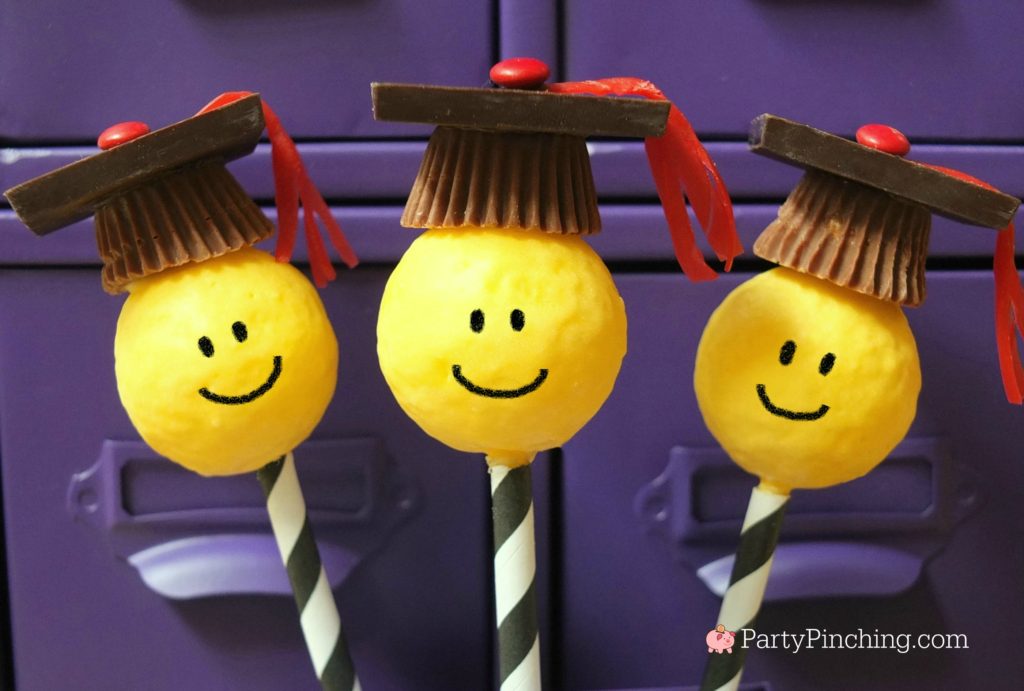
You will earn your degree in adorableness with these Happy Graduate Cake Pops!
Happy Graduate Cake Pops
Happy Graduate Cake Pops are so easy to make since they're no-bake! The perfect dessert idea for your Graduation Open House Party
Ingredients
- 12 snack cakes (such as Little Debbie Fancy Cakes)
- 1 (12 oz.) bag of yellow candy coating wafers
- 12 lollipop sticks
- 12 chocolate squares (such as Ghirardelli or World Market)
- 12 mini M&M’s
- 1 Fruit by the Foot
- 12 miniature peanut butter cups
- Black edible marker
Instructions
1. Unwrap 1 snack cake and place in a bowl. Mash with a fork or mush with your hands to bind the frosting and cake together.
2. Roll into a ball.
3. Melt candy coating wafers according to package instructions.
4. Dip one end of a lollipop stick in the melted candy coating and push halfway into the cake ball.
5. Place cake pops on a cookie sheet lined with parchment paper in the freezer for an hour.
6. Dip cake pop into the melted candy coating, tapping the stick gently against the side of the bowl to remove excess.
7. Place in Styrofoam block to dry.
8. Cut off a 2” strip of Fruit by the Foot, then cut in half horizontally.
9. Make 3 cuts lengthwise halfway through the Fruit by the Foot.
10. Roll the remaining uncut part of the Fruit by the Foot together so it resembles a tassel.
11. Attach the tassel to the middle of the chocolate square with the melted candy coating.
12. With a toothpick dipped in melted candy coating, attach the mini M&M in the middle of the chocolate square and cover the tassel. Let dry completely.
13. Using the melted candy coating, attach the chocolate square to the BOTTOM of a miniature peanut butter cup so it resembles the mortarboard cap.
14. Secure the cap to the top of the cake pop using the melted candy coating.
15. With the black edible marker, draw a smiley face on the front of the cake pop.
Makes 12 Happy Graduate Cake Pops
Tip: For step-by step instructions on how to make no-bake cake pops, see my website Party Pinching for the recipe titled: NO-BAKE CAKE POPS
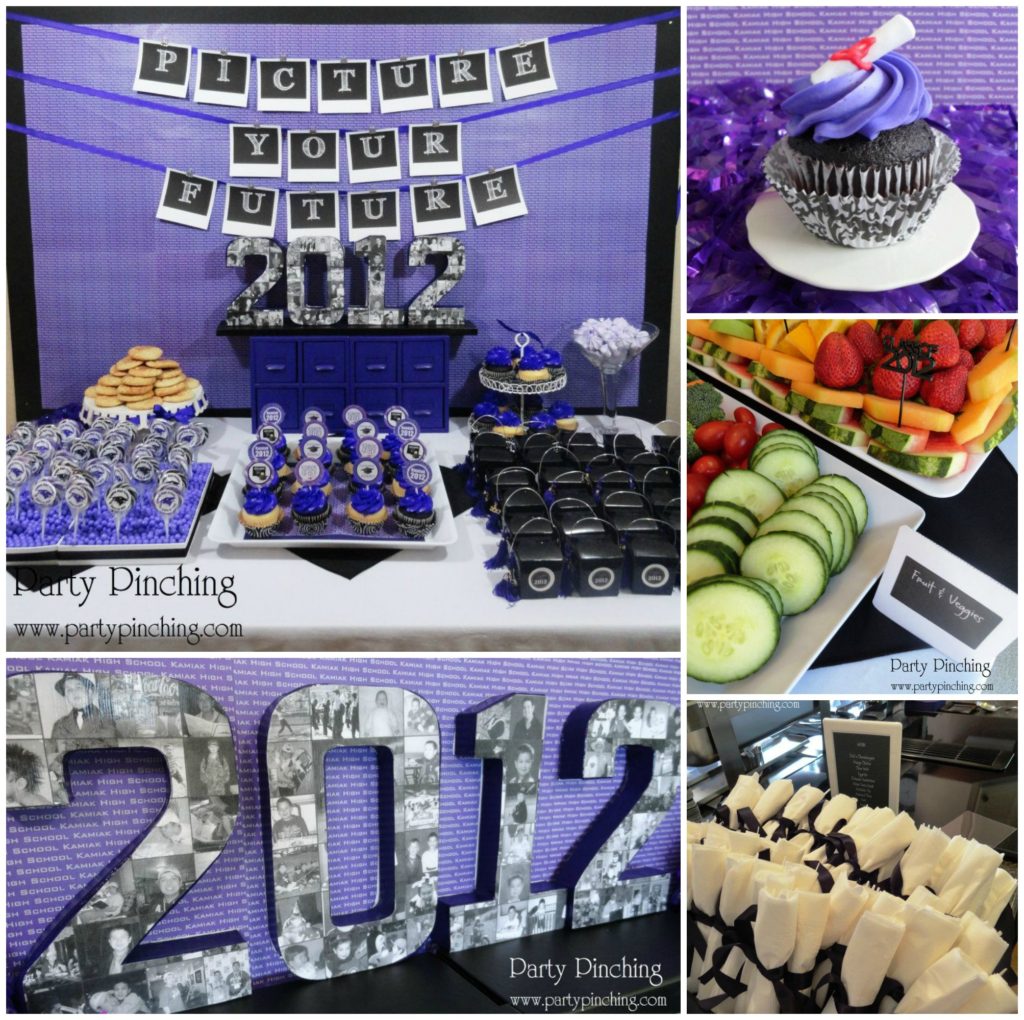
Party Pinching has THE BEST GRADUATION PARTY IDEAS for food, decor, gifts & more! Click here to see all of the awesome ideas your grad and guests will love!
More Ideas for graduation party – Please visit
https://partypinching.com/category/graduation-party