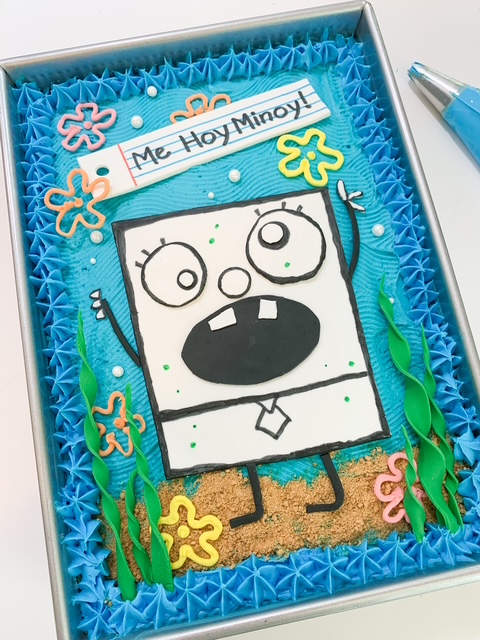
If you have a SpongeBob fan in your life, they will absolutely love this DoodleBob Cake! This is such a fun and easy cake to make, SpongeBob fans of all ages will love it!
This post may contain affiliate links. Please read our disclosure policy. As an Amazon Associate, I earn from qualifying purchases.


You will need:
9×13 cake – any flavor, our favorite is my Best Chocolate Cake Ever! Click here for the recipe
Yellow, pink and orange and blue buttercream frosting, store bought or click here for my easy recipe
Black, blue, green and red edible markers
Crushed graham crackers
#5 and #1M piping tips with bags
Pizza cutter or knife
Parchment paper
Wavy design tool (optional)
Directions for DoodleBob Cake
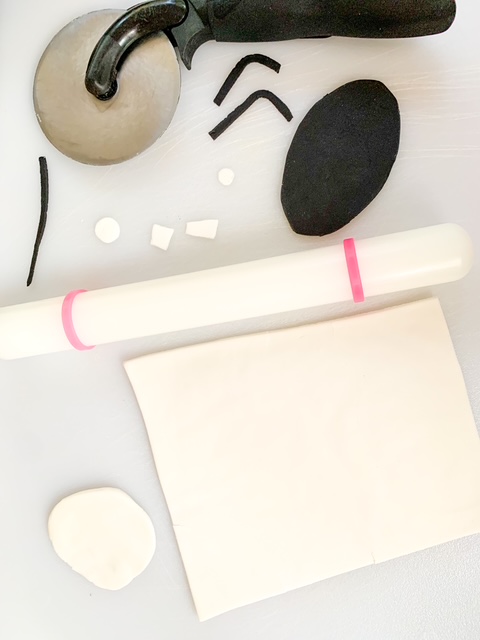
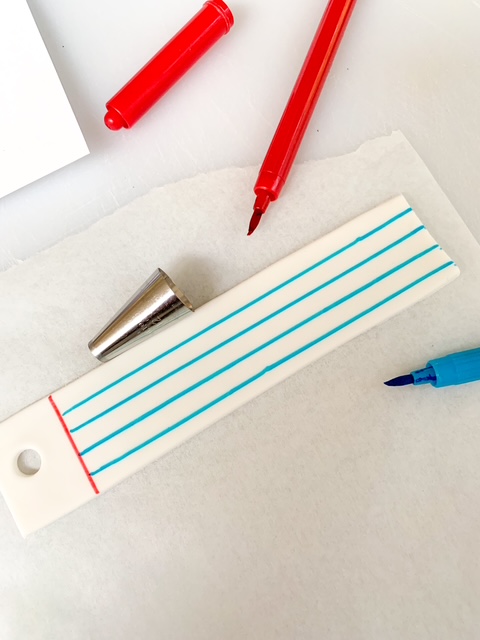
Roll out the white fondant on parchment paper and using the pizza cutter cut out shapes for DoodleBob’s body, eyes, teeth, and hands. Roll out a long rectangular piece for the Hoy Me Minoy banner (optional). Let dry completely for 24 hours.
Next roll out the black fondant and using the pizza cutter, cut out shapes for the mouth, legs and arms. Let dry completely for 24 hours.
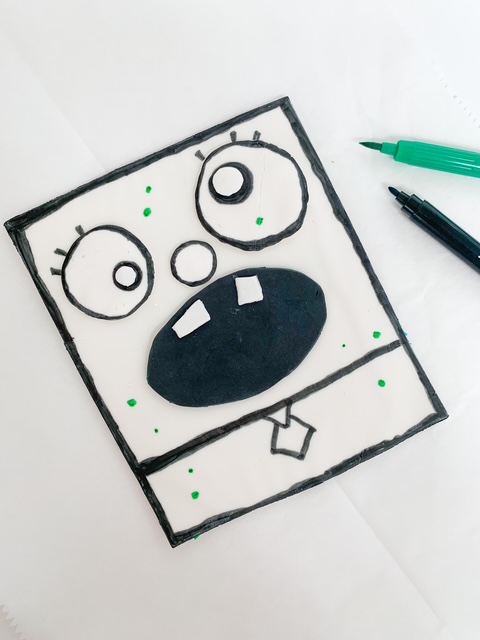
When completely dry, draw in the details using the edible markers.
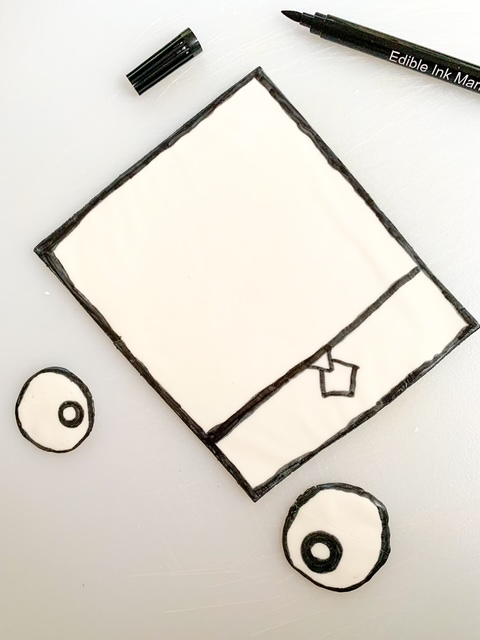
Then attach the eyes, nose, mouth and teeth with buttercream.
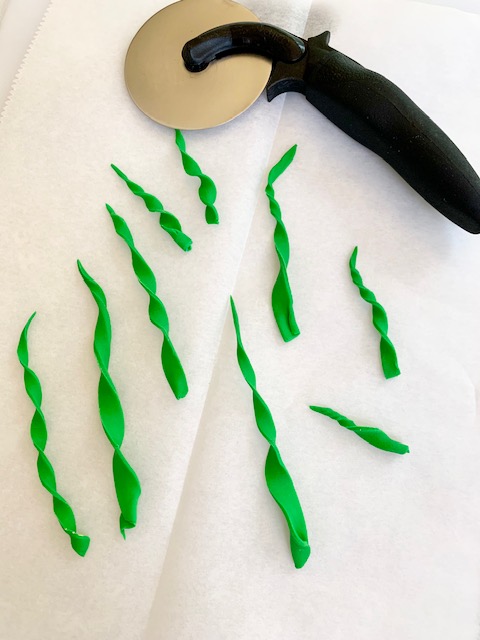
Now roll out the green fondant and using the pizza cutters, cut out long strips in various sizes for the seaweed. Then twist the fondant and pinch one end so it looks like seaweed. Let dry for 24 hours.
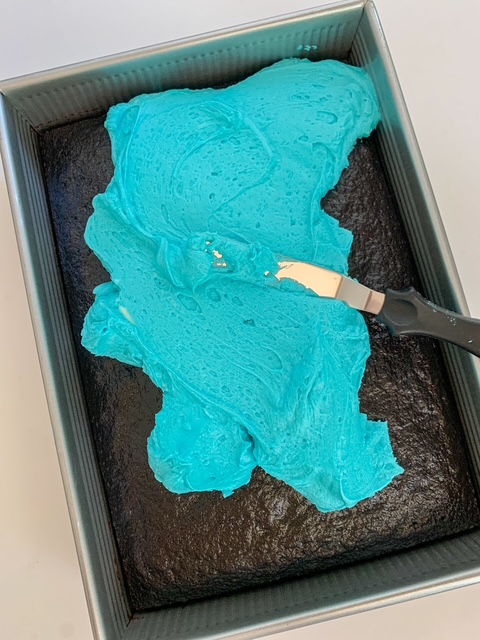
Bake cake and let cool completely. Frost the top of the cake with blue buttercream.
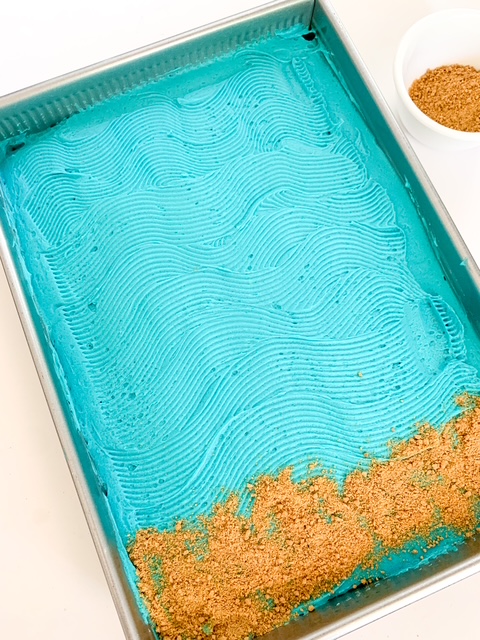
Now turn the cake so that it is vertical and then using the wavy frosting tool, make waves in the buttercream. I didn’t have the tool I wanted so I had to improvise and use a piping tip. You can always use a knife, but I really wish my tool was delivered on time for bigger waves.

Next, sprinkle the crushed graham crackers on the bottom of the cake.
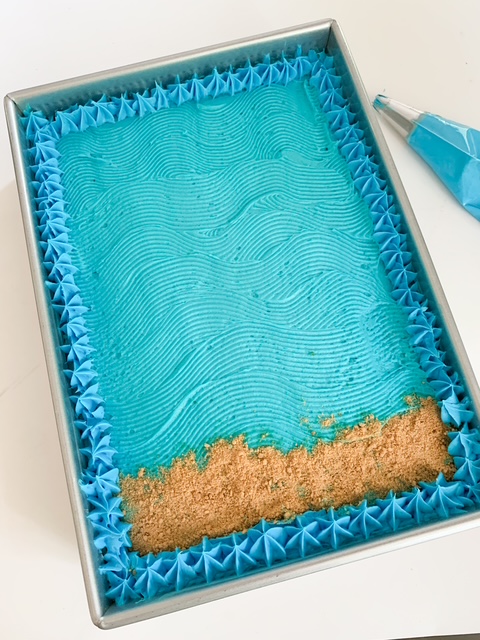
Then pipe the border with blue frosting using a #1M piping tip
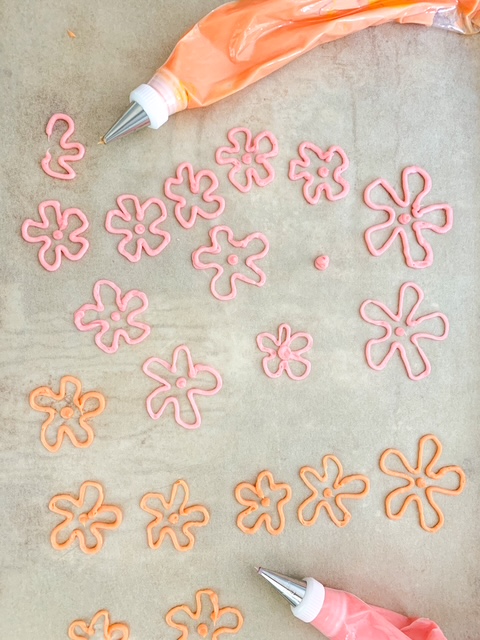
Using a #5 piping tip, pipe out flowers using the yellow, pink and orange buttercream. You can do this the day before on parchment paper and let dry overnight and place them on the cake or you can pipe it directly on the cake.
Finally place everything on the cake to decorate!


To see my Ultimate SpongeBob party for more food and party ideas, click here
DoodleBob Cake

This DoodleBob cake is so fun to make! Your SpongeBob fan will love it!
Ingredients
- 9x13 cake – any flavor
- Yellow, pink and orange buttercream
- Blue buttercream
- White fondant
- Black fondant
- Green fondant
- Black, blue and red edible markers
- Pearl sprinkles
- Crushed graham crackers
- 9x13 baking pan
- #5 piping tip
- #1M piping tip
- Wavy frosting tool
- Parchment paper
- Fondant roller
Instructions
- Roll out the white fondant on parchment paper and using the pizza cutter cut out shapes for DoodleBob’s body, eyes, teeth, and hands. Roll out a long rectangular piece for the Hoy Me Minoy banner (optional). Let dry completely for 24 hours.
- When completely dry, draw in the details using the edible markers.
- Then attach the eyes, nose, mouth and teeth with buttercream.
- Next roll out the black fondant and using the pizza cutter, cut out shapes for the mouth, legs and arms. Let dry completely for 24 hours.
- Now roll out the green fondant and using the pizza cutters, cut out long strips in various sizes for the seaweed. Then twist the fondant and pinch one end so it looks like seaweed. Let dry for 24 hours.
- Bake cake and let cool completely. Frost the top of the cake with blue buttercream.
- Now turn the cake so that it is vertical and then using the wavy frosting tool, make waves in the buttercream. I didn’t have the tool I wanted so I had to improvise and use a piping tip. You can always use a knife, but I really wish my tool was delivered on time for bigger waves.
- Next, sprinkle the crushed graham crackers on the bottom of the cake.
- Then pipe the border with blue frosting using a #1M piping tip
- Using a #5 piping tip, pipe out flowers using the yellow, pink and orange buttercream. You can do this the day before on parchment paper and let dry overnight and place them on the cake or you can pipe it directly on the cake.
- Finally place everything on the cake to decorate!